| .. | ||
| cpp | ||
| model | ||
| py | ||
| README.md | ||
| result.jpg | ||
| Visualization.png | ||



retinaface
1.Overview
2.Model Download
-
Open Source model
-
Open Source projects:
-
Export Model Step:
-
Install ultralytics
pip install torch==2.4.1
pip install torchvision==0.19.1
pip install ultralytics==8.3.0
-
Download weights
-
Export Model
-
-
-
Exported Model
link to amlogic server( onnx model or quantized tflite)
3. Model Conversion
cd model
Usage:   ./adla_convert.sh model_path adla_toolkit_path target_platform

example
| Parameter | Description |
|---|---|
| model_path | onnx model path |
| adla_toolkit_path | path to adla_toolkit |
| target_platform | Specify target platform. for A311D2 : PRODUCT_PID0XA003. for S905X5: PRODUCT_PID0XA005 |
4. Demo Run
CPP
1. Compile
Prerequisites:
- Android NDK (r25e recommended)
ANDROID_NDK_PATHenvironment variable set
Build:
# Build for arm64-v8a
cd examples/retinaface/cpp
AMLNN_HOME=/path/to/amlnn-toolkit ./build-android.sh -a arm64-v8a
The executable will be generated at build/android/retinaface_demo (Note: executable name may vary, verify in build folder).
2. Run
# Push executable to device
adb push build/android/retinaface_demo /data/local/tmp/
adb push model/RetinaFace_int8_A311D2.adla /data/local/tmp/
adb push imgs /data/local/tmp/

# Run on device
adb shell
cd /data/local/tmp
chmod +x retinaface_demo
export LD_LIBRARY_PATH=/vendor/lib64 or (/vendor/lib)

# Usage: ./retinaface_demo <model_path> <image_dir>
./retinaface_demo RetinaFace_int8_A311D2.adla ./imgs
Note: Replace RetinaFace_int8_A311D2.adla with your actual model file path.
Python
Prerequisites:
- Python 3.10
- Required packages:
numpy,opencv-python,amlnnlite
Install dependencies:
pip install numpy opencv-python amlnnlite-1.0.0-cp310-cp310-linux_aarch64.whl
Run on device:
python RetinaFace.py \
    --model-path ./RetinaFace_int8_A311D2.adla \
    --image-dir ./imgs \
    --run-cycles 1 \
    --loglevel INFO
Argument Descriptions:
| Argument | Description |
|---|---|
| --board-work-path | Work path on board, default is /data/local/tmp |
| --model-path | path to .adla model |
| --image-dir | Directory containing test images |
| --run-cycles | Number of inference cycles, default is 1 |
| --loglevel | Logging level: DEBUG / INFO / WARNING / ERROR, default is WARNING |
The script will automatically process all image files (.jpg, .jpeg, .png, .bmp) in the current directory and save results to a {model_name}_result folder.
5.Results
Performance Feedback
By setting the loglevel to INFO, the program provides real-time performance metrics upon completion. The console log will display essential hardware and execution details, including:
- Hardware Information: System and ADLA library versions.
- Model Overview: Basic input/output configurations.
- NPU Metrics: Total inference time (latency) and total DRAM bandwidth consumption.
Detection Output
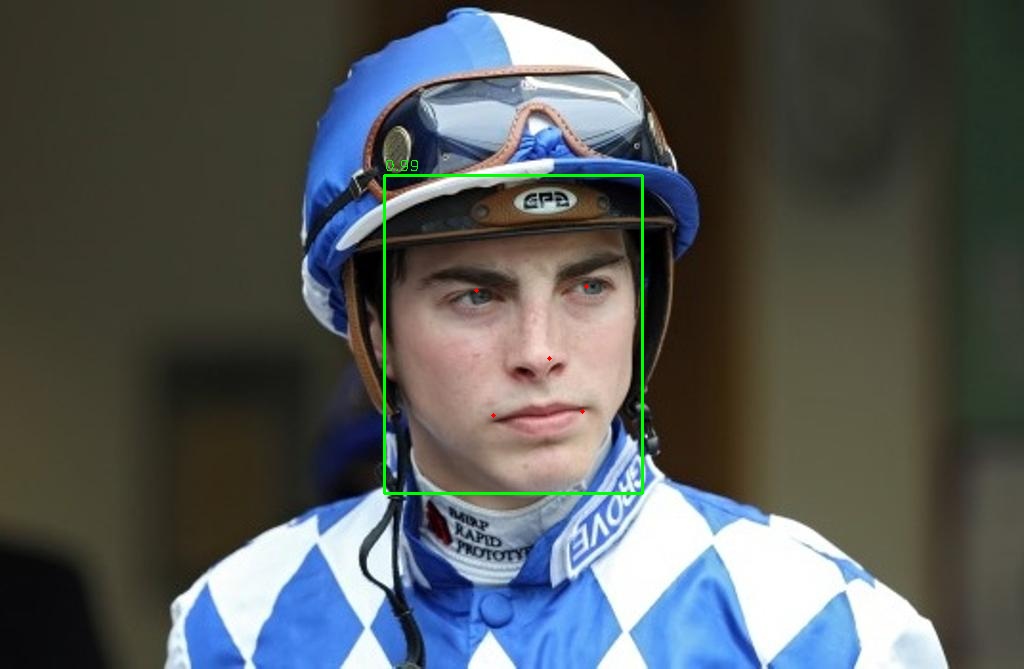
The program will print the detection count. The output images, featuring bounding boxes and five facial landmarks (eyes, nose, and mouth corners), will be saved to the {model_name}_result folder.
You can pull the result folder back to view it:
adb pull /data/local/tmp/RetinaFace_int8_A311D2_result
Profiling Visualization
After a successful run of the Python demo, a folder named after the model (e.g., {model_name}) will be generated in the script directory. This folder contains 5 HTML files that provide a visual and detailed breakdown of per-layer performance:
hard_op_chart.html&soft_op_chart.html: Hardware/Software op execution details.dram_rd_chart.html&dram_wr_chart.html: Bandwidth read/write distribution.pie_charts_distribution.html: Overall resource allocation.
You can pull the result folder back to view it:
adb pull /data/local/tmp/RetinaFace_int8_A311D2
Taking hard_op_chart.html as an example (shown below), each layer's ADLA operator name includes parentheses containing the index of the corresponding quantized .tflite layer(s); by default, these indices are suppressed, and operators are labeled generically as "hardware" or "software" without numerical suffixes.
